7 Backyard Pool and Kitchen Integration Ideas That Work
Last Updated: November 2, 2026
Quick Summary
Backyard pool and kitchen integration means designing the pool deck, cooking zone, and dining space as one continuous outdoor living area instead of three separate projects. Keep the cooking zone at least 5 to 6 feet back from the water's edge, and route the main house-to-pool path behind the cook.
- Keep the primary path from house to pool at least 4 feet wide and behind the cook.
- Allow 36-42 inches of clear floor behind the cook so nobody brushes a hot grill.
- Textured pavers give grip under bare feet and drain well when the deck gets soaked.
- A solid-roof pavilion needs a roof slope of at least 1/4 inch per foot for drainage.
- Build in sequence: design and permits, pool and rough utilities, deck, then kitchen.
Table of Contents
- Why Pool and Kitchen Integration Changes How You Use Your Backyard
- Poolside Outdoor Kitchen Layout: Zones, Clearances, and Traffic Flow
- Pool and Outdoor Kitchen Ideas That Maximize Flow and Function
- Outdoor Kitchen Materials for Pool Areas: What Survives Splash and Sun
- Covered Outdoor Kitchen by Pool: Shade, Weather Protection, and Permits
- Safety, Utilities, and Drainage Planning Most Homeowners Skip
- Budget and Phased Construction: What to Build First
- Planning Your Pool and Kitchen Integration with Howland Pools
- Frequently Asked Questions
Why Pool and Kitchen Integration Changes How You Use Your Backyard
Backyard pool and kitchen integration means designing the pool deck, cooking zone, and dining space as one continuous outdoor living area rather than three separate projects. Done well, it turns a yard you use on hot weekends into a space your family gravitates toward every warm evening. Building pools, patios, enclosures, and outdoor kitchens as a single project keeps the pieces aligned.
The difference shows up in how people move. When the grill sits forty feet from the shallow end with a dining table stranded between them, someone is always walking, carrying something, and missing the conversation.
Many design guides focus on photos and skip the measurements, drainage, and permitting that decide whether a space will work. Below are integration ideas, plus the clearances, materials, and phasing that make them buildable.
Poolside Outdoor Kitchen Layout: Zones, Clearances, and Traffic Flow
A poolside outdoor kitchen layout works when it separates three zones (cooking, dining, swimming) while keeping short, unobstructed paths between them. The cook needs room to work, guests need room to pass behind, and wet feet need a route that does not cross the grill.
Borrow the indoor work triangle: grill, prep counter, and serving or bar area within a few steps of each other, with the dining table just beyond.
Minimum Clearances Between Pool Edge and Cooking Area
As a working rule, keep the cooking zone at least 5 to 6 feet back from the water's edge, and more if the grill faces the prevailing wind. That protects equipment from splash, keeps hot surfaces away from wet, running children, and gives you a safety buffer.
- Pool edge to grill face: 5-6 feet minimum, more for a built-in grill with a landing counter
- Behind the cook: 36-42 inches of clear floor so nobody brushes a hot grill
- Bar overhang: 12-15 inches of counter overhang for knee room at stools
Watch out: the most common mistake we see is squeezing the grill against the pool for a prettier photo. It looks great in a rendering and feels cramped and unsafe the first weekend you cook for guests.
Pool and Outdoor Kitchen Ideas That Maximize Flow and Function
The best pool and outdoor kitchen ideas solve a movement problem, not just a visual one. Each layout below pairs a specific footprint with how families actually use a backyard: cooking, eating, swimming, and hosting at once.
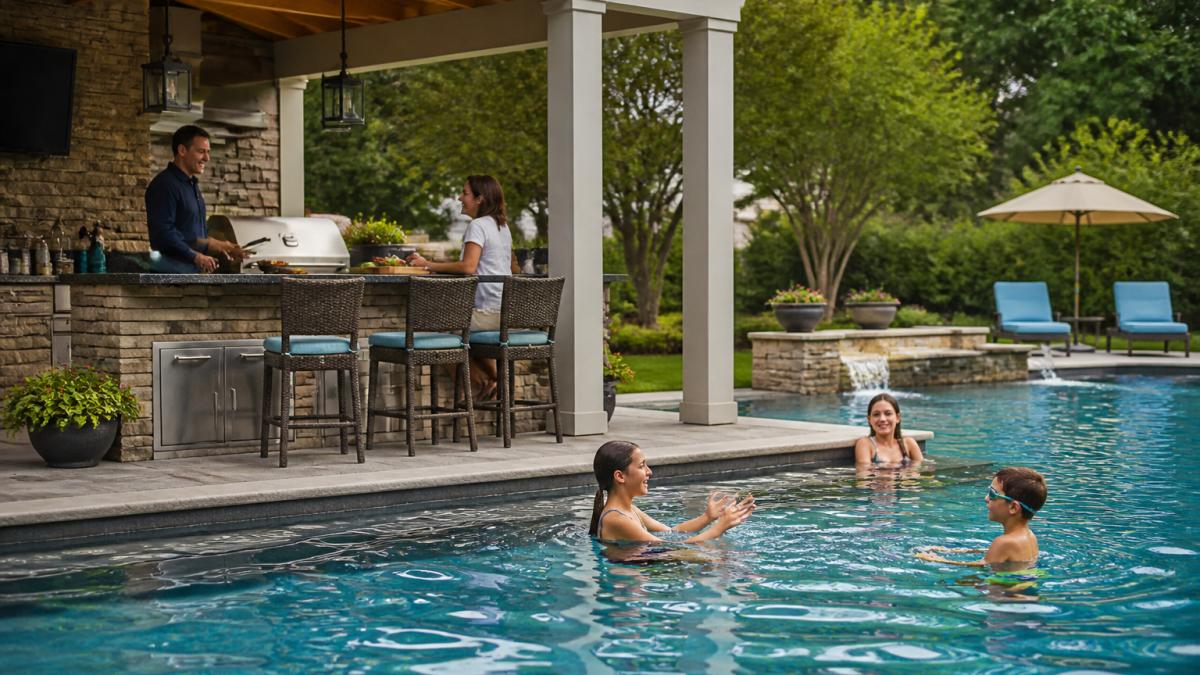
The L-Shaped Kitchen with Bar Seating
An L-shaped run along two sides of the patio creates a natural corner for the grill and prep space, with the short leg doubling as a bar. Stools on the pool side let guests sit, talk to the cook, and watch swimmers. It can suit medium yards because it defines the cooking zone without walling it off.
Best for: families who host often and want the cook in the middle of the action. Skip if: your patio is narrow, since an L-shape eats corner space fast.
The Split-Level Patio with Sunken Dining
Two elevations, one step apart, separate dining from the pool deck without a railing. The upper level holds the kitchen and a covered seating area; the lower level steps down to the pool and a sunken dining table. The height change creates visual separation and keeps splashing away from the food.
Best for: sloped lots where grading already suggests two levels. Skip if: anyone in the household has mobility concerns, because steps add risk.
Outdoor Kitchen Materials for Pool Areas: What Survives Splash and Sun
Outdoor kitchen materials for pool areas need to handle chlorinated splash, constant UV, and freeze-thaw cycles, which rules out several finishes that work fine on a covered porch. Choose for water resistance and slip resistance first, appearance second.
Countertops, Cabinets, and Flooring Compared
| Material | Best Use | Water and Sun Performance | Watch Out For |
|---|---|---|---|
| Natural stone slab | Countertops | Strong UV and heat resistance | Sealing; slippery when wet |
| Cast concrete | Countertops, bars | Good, can be sealed | Hairline cracks over time |
| Stainless steel cabinets | Cabinet frames | Excellent near water | Hot to touch in direct sun |
| Marine-grade polymer | Cabinet doors | Resists moisture and rot | Pricier than wood |
| Textured pavers | Pool deck and kitchen floor | Slip resistant, freeze-thaw stable | Needs proper base prep |
Flooring matters as much as the counter. Smooth tile around a pool is a slip hazard the moment it gets wet. A textured paver with a slightly rough face gives grip under bare feet and drains well when the deck gets soaked.
Covered Outdoor Kitchen by Pool: Shade, Weather Protection, and Permits
A covered outdoor kitchen by the pool extends your cooking season and protects the investment, but the structure is where permits, footings, and inspection sequencing get serious. The decisions that determine whether it survives ten summers are structural and code-driven.
Shade Strategy: Pergola vs. Pavilion vs. Cantilever
Three shade approaches dominate, and each trades cost against weather protection:
- Open pergola with adjustable louvers. Lowest structural load, no roof drainage to design, and louvers tune sun angle through the day. Best for mild climates and homeowners who want the kitchen to feel outdoors. Louvers do not stop wind-driven rain.
- Solid-roof pavilion. Real weather protection and the only option that lets you cook through light rain. Requires footings, a roof slope of at least 1/4 inch per foot for drainage, and gutters or scuppers that discharge away from the pool deck. Structural load is higher, so footing size and depth increase.
- Cantilever or attached roof off the house. Cheapest per square foot because it ties into existing framing, but it limits where the kitchen can sit and often forces the cooking zone against the house wall, which can push smoke toward the pool.
Orientation matters as much as roof type. Face the open side of the structure away from the pool so smoke and heat vent away from swimmers, and place the grill on the downwind side of the prevailing summer breeze. A common pattern sets the grill against the back wall of a pavilion with the serving counter facing the pool, so the cook works with their back to the wall and guests approach from the water side.
Footings, Pool Shell Clearance, and Structural Coordination
This is where pool and kitchen contractors most often collide. A pavilion footing near a pool shell cannot simply be dug where the drawing shows it, the pool wall, plumbing, and bonding grid are already there.
The practical fix is to design the covered structure at the same time as the pool, so footing locations, utility stub-outs, and the bonding grid are laid out on one drawing.
Permits and Inspection Sequence
Most jurisdictions require separate permits for a covered structure, a gas line, and electrical work, and often a separate trade permit for each.
Watch out: homeowners frequently assume the pool contractor is pulling the kitchen permits. The International Code Council's pool and spa code resources outline the safety and construction standards many local codes are built on, and the International Code Council's outdoor kitchen and appliance guidance is a useful starting point for covered-structure and appliance clearances.
Safety, Utilities, and Drainage Planning Most Homeowners Skip
Safety, utilities, and drainage decide whether an integrated space works for years or becomes a repair list. They also get the least attention in design galleries, so this section goes deeper than the inspiration pages do.
Safety: Separation, Supervision, and Hot-Surface Control
The core principle is separation with visibility: keep hot surfaces, sharp tools, and gas connections out of the direct splash zone, and keep a clear sightline from the cooking area to the pool.
Measurable rules that hold up in practice:
- Grill face to pool edge: 5-6 feet minimum, more if the grill faces the prevailing wind, so splash and spray do not reach burners and hot lids.
- Hot-surface buffer: keep the grill and side burners out of the main wet-traffic path between the house and the pool. Route wet feet behind the cook, never between the cook and the grill.
- Bar and counter edges: round or eased edges within 3 feet of a walking lane, since wet bare feet and square corners do not mix.
Watch out: the most common safety failure is a grill placed on the pool side of the bar so guests can watch the cook, putting a hot surface directly in the path of running, wet children.
Utilities: Gas, Electrical, Water, and Ventilation
Plan gas, electrical, and water lines before the patio is poured, because running them after is the single most expensive retrofit in an outdoor kitchen. The practical sequence:
- Gas: size the line for the total connected load (grill, side burner, outdoor heater, fire feature), not just the grill. A line sized for one appliance will starve a second one added later. Run it in a sleeve under the deck so it can be replaced without demolition.
- Electrical: dedicated circuits for lighting, outlets, and any refrigeration, all on GFCI protection. Outlets within reach of the pool deck need weatherproof covers, and any lighting within the pool zone must be bonded per code.
- Water and drain: a sink needs a supply line and a drain that ties into the house system or a dry well, decide which before the slab is poured. A bar sink without a planned drain becomes a bucket sink.
Drainage: Slope, Runoff, and Keeping Water Out of the Cooking Zone
Drainage is where integrated spaces fail quietly. The deck must slope away from both the pool and the kitchen, and runoff from the cooking area should not wash across the pool deck or into the pool.
- Deck slope: a minimum of about 1/8 inch per foot away from structures and the pool coping, with no ponding spots.
- Channel drain: place a linear drain between the cooking zone and the pool deck when the two share a slab, so wash-down water and runoff do not cross into the pool area.
- Downspouts and scuppers: discharge roof water at least several feet from the kitchen footings and away from the pool, ideally into a splash block or buried line.
The U.S. Environmental Protection Agency's guidance on managing runoff explains why directing water matters for both the structure and the surrounding landscape, and the International Code Council's residential code resources cover the electrical and gas provisions most local inspectors apply to outdoor kitchens.
Budget and Phased Construction: What to Build First
Phasing lets you build the pool and kitchen integration in stages without tearing up finished work later. Decide the full layout up front, then build in an order that protects what is already done.
Build in this sequence:
- Design and permits first. Lock the full plan, including future phases, so footings and utility runs are placed correctly now.
- Pool and rough utilities second. Install the pool shell and stub out gas, electrical, and water to where the kitchen will go.
- Deck and patio third. Pour or lay the deck once the pool is set, sloping it for drainage.
- Kitchen and structures last. Add the grill, counters, and any covered structure on top of a finished, stable base.
For a fuller cost framework, see our guide to the cost of custom inground pools, and if you are worried about scope creep, our advice on avoiding budget overruns on pool projects covers line-item planning and contingency. The Federal Trade Commission's consumer guidance on home improvement contracts is worth reading before you sign anything.
Planning Your Pool and Kitchen Integration with Howland Pools
The throughline in every good integration is the same: one plan, one team, one sequence.
Howland Pools designs and builds custom inground pools, spas, patios, enclosures, and outdoor kitchens, managed start to finish by one team.
If you want a clearer picture of how the pieces fit, explore our modern backyard living space ideas to frame the vision before the first measurement.
Frequently Asked Questions
How much space should be between a pool and an outdoor kitchen?
Plan for adequate clear deck between the pool edge and any cooking surface, with more room if you want bar seating or a dining table in between. Local building codes may require additional clearance for grills and fire features. The goal is enough room for foot traffic, splashing kids, and safe movement with hot food. A designer can map exact dimensions against your pool shape and patio footprint.
Which materials work best for an outdoor kitchen near a pool?
For poolside outdoor kitchen materials, choose non-porous countertops like granite, quartzite, or sealed concrete that resist chlorine and splash. Marine-grade stainless steel cabinets and appliances hold up better than painted steel. For flooring, textured pavers or travertine provide grip when wet. Avoid unsealed wood and porous limestone near the pool edge, since constant moisture and pool chemicals break them down faster. Reapply sealant every one to two years.
Should an outdoor kitchen be covered near a pool?
A covered outdoor kitchen by the pool extends your cooking season and protects appliances from rain and direct sun. A pergola with a retractable canopy or a solid-roof pavilion works well, but check local permit rules for roof structures and electrical work. Cover also reduces glare and keeps guests comfortable during summer afternoons. If full cover is not in the budget now, plan the footings and wiring so you can add a roof later without rebuilding.
How do you keep a poolside kitchen safe and comfortable?
Separate the cooking zone from the pool with a clear walkway, keep grill handles and hot surfaces away from wet hands, and store pool chemicals far from food prep. Install GFCI outlets and keep electrical equipment at least 6 feet from the water. For comfort, add shade, ceiling fans, and slip-resistant flooring. A pool safety fence or alarm adds a layer of protection for families with young children. Review the full layout with your builder before construction starts.
Your backyard can work as one connected space instead of three separate projects. Howland Pools brings the pool, patio, enclosures, and outdoor kitchen together under one team, from design through the final walkthrough, with a free consultation to get started. Get started with Howland Pools and build a backyard your family uses all season.